

RCR Companion Guide: For Low & Slow, Episode Six
Alison's spicy vinegar chicken, u for umami, cutting board care, POT ROAST and more!


Want to listen after all? Head on over to the podcast.
Hello dear listeners (readers) and welcome back to another episode of ‘Low & Slow’ here on Rebel Chef Radio. How has your summer been treating you so far? We have been really soaking up each day and enjoying a wonderful combination of adventure and relaxation.
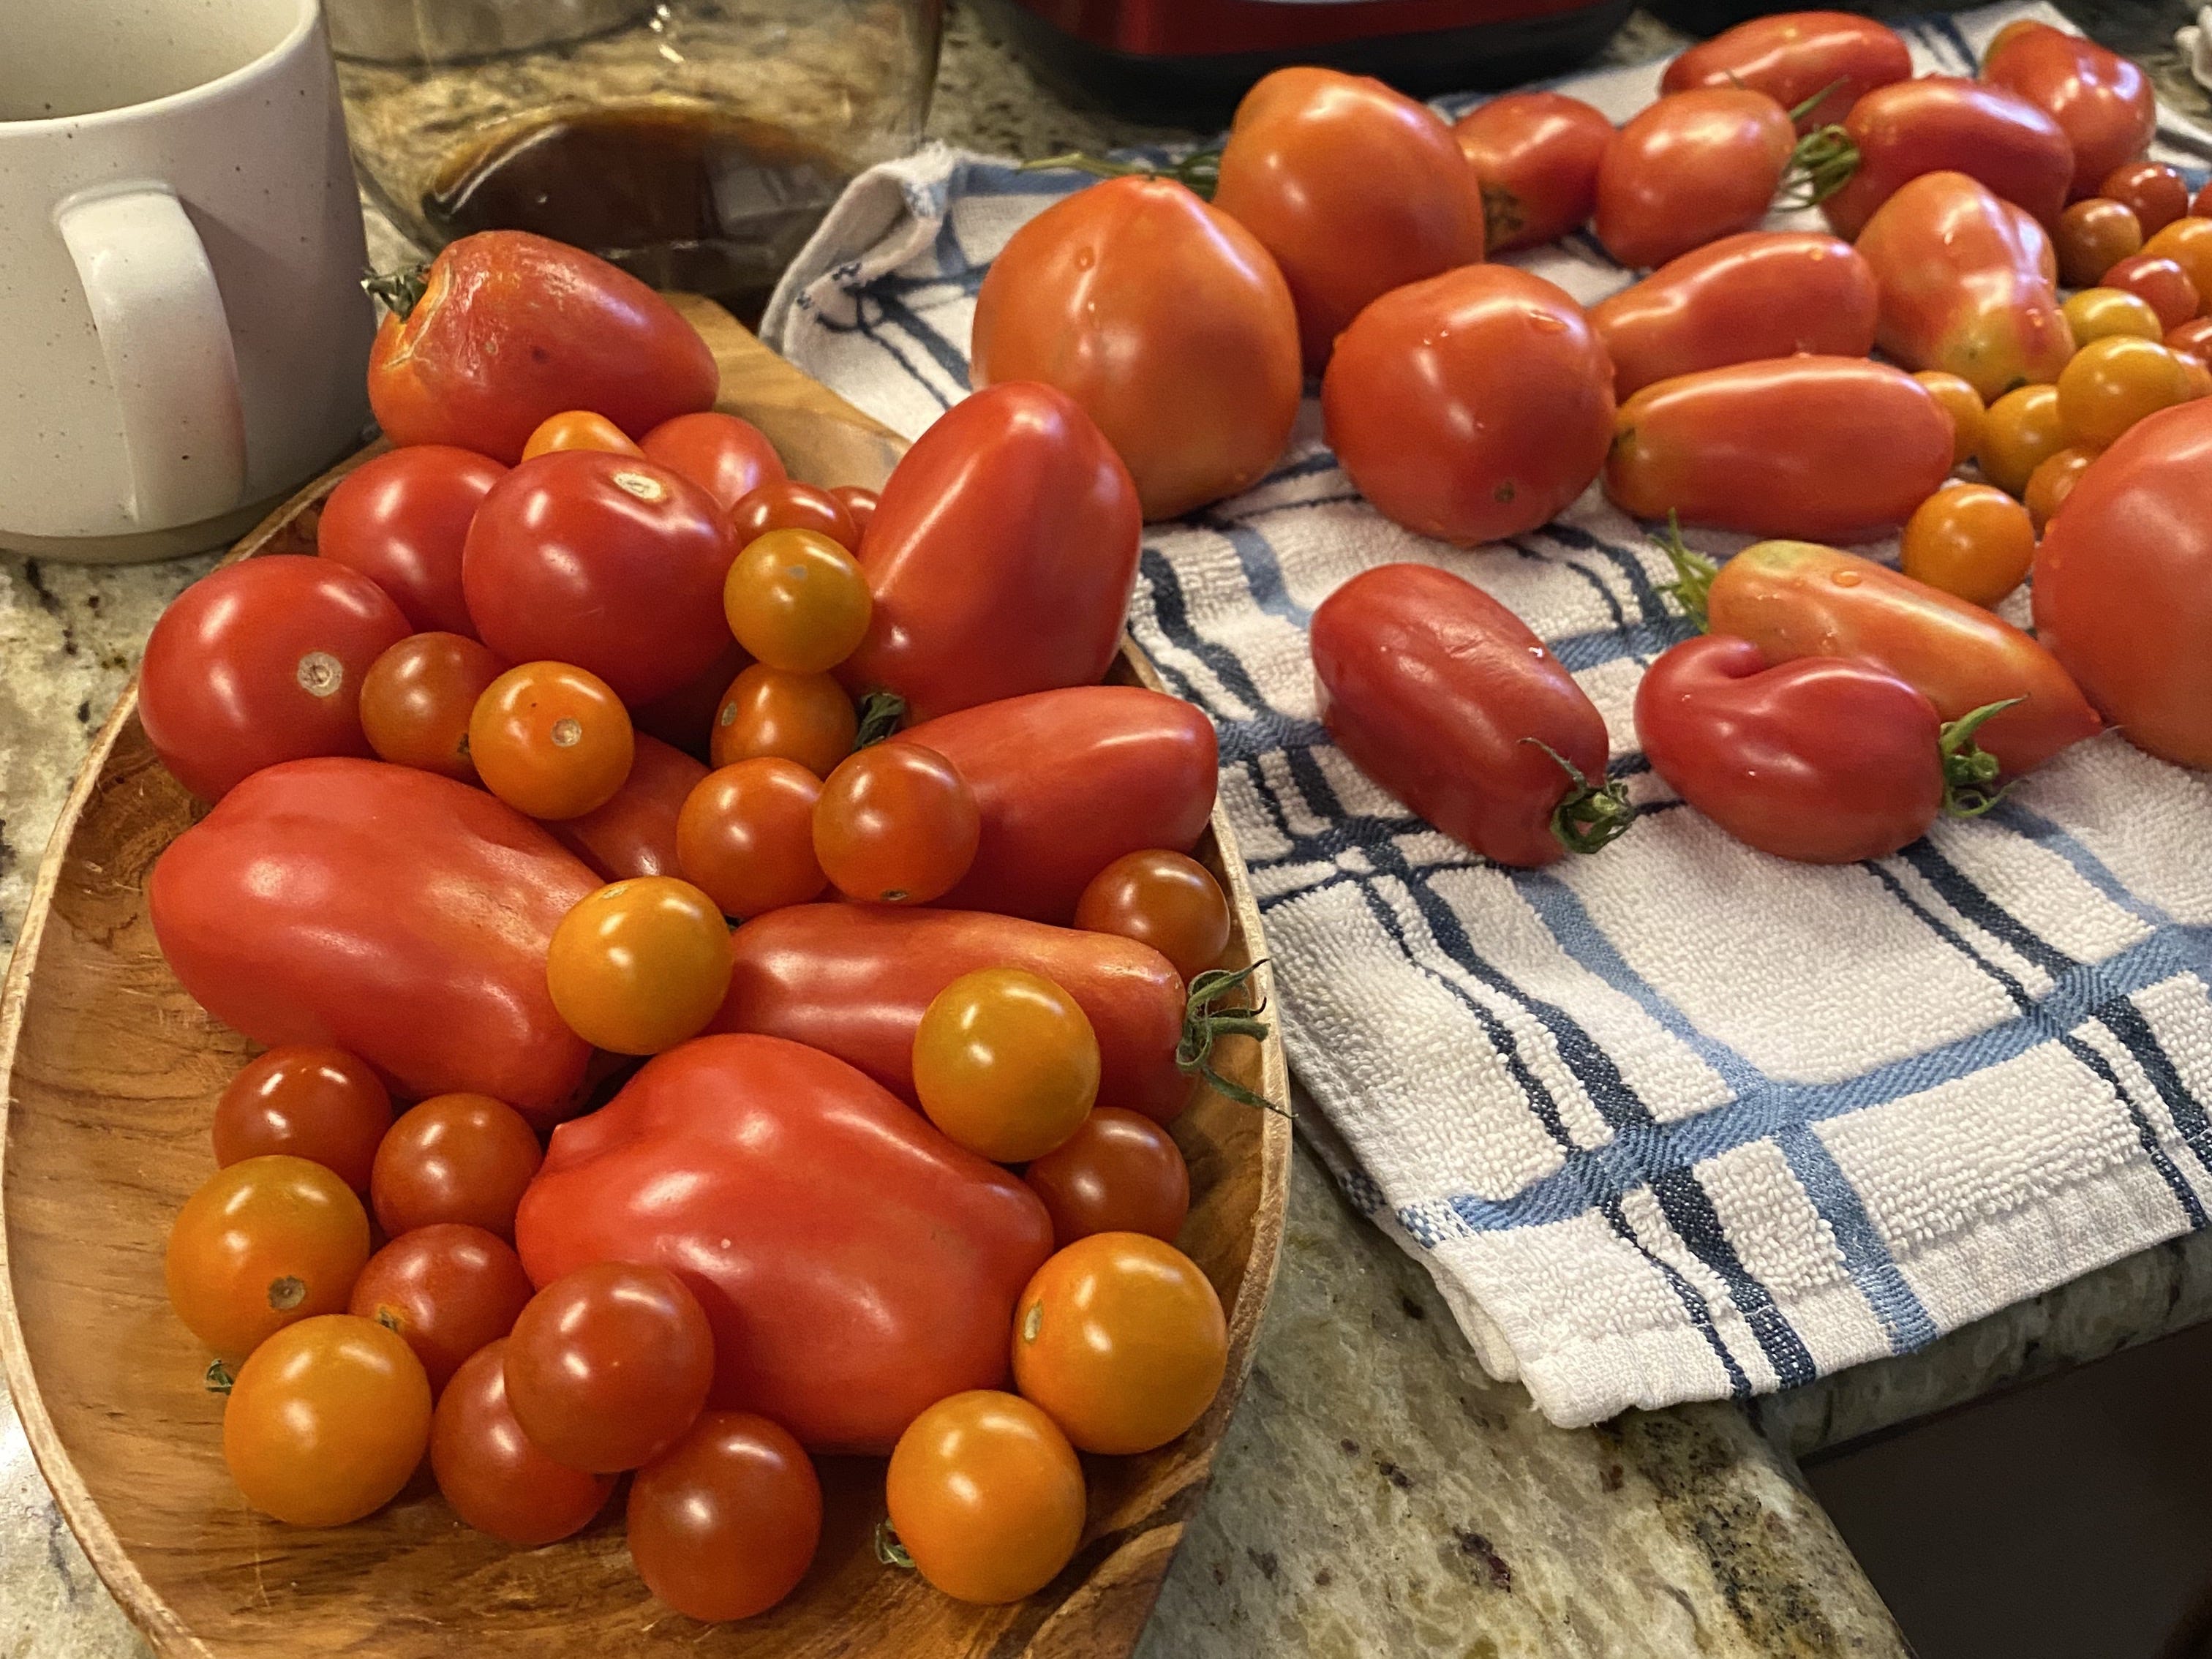
I would argue that outside of the depths of winter when the food is generally at it’s gooiest and most comforting, the height of summer is the optimal time for eating and cooking. The produce does practically all of the work for us and all we have to do is enjoy. I’ve had particular success with my tomatoes this year. After many years of watching my plants grow and ripen to near perfection, only to be decimated by squirrels in the eleventh hour- the hawks have finally taken pity on me and come to my aide (sorry squirrels). My tomato plants have been, quite literally, ‘popping off’. Four varieties, unique and beautiful in their own special ways, filling my countertops, washing over my tastebuds and piling up in my stomach.
Without further ado- here’s what we talked about on the show!
Segment One- Rebel Chef Home: What I cooked this week
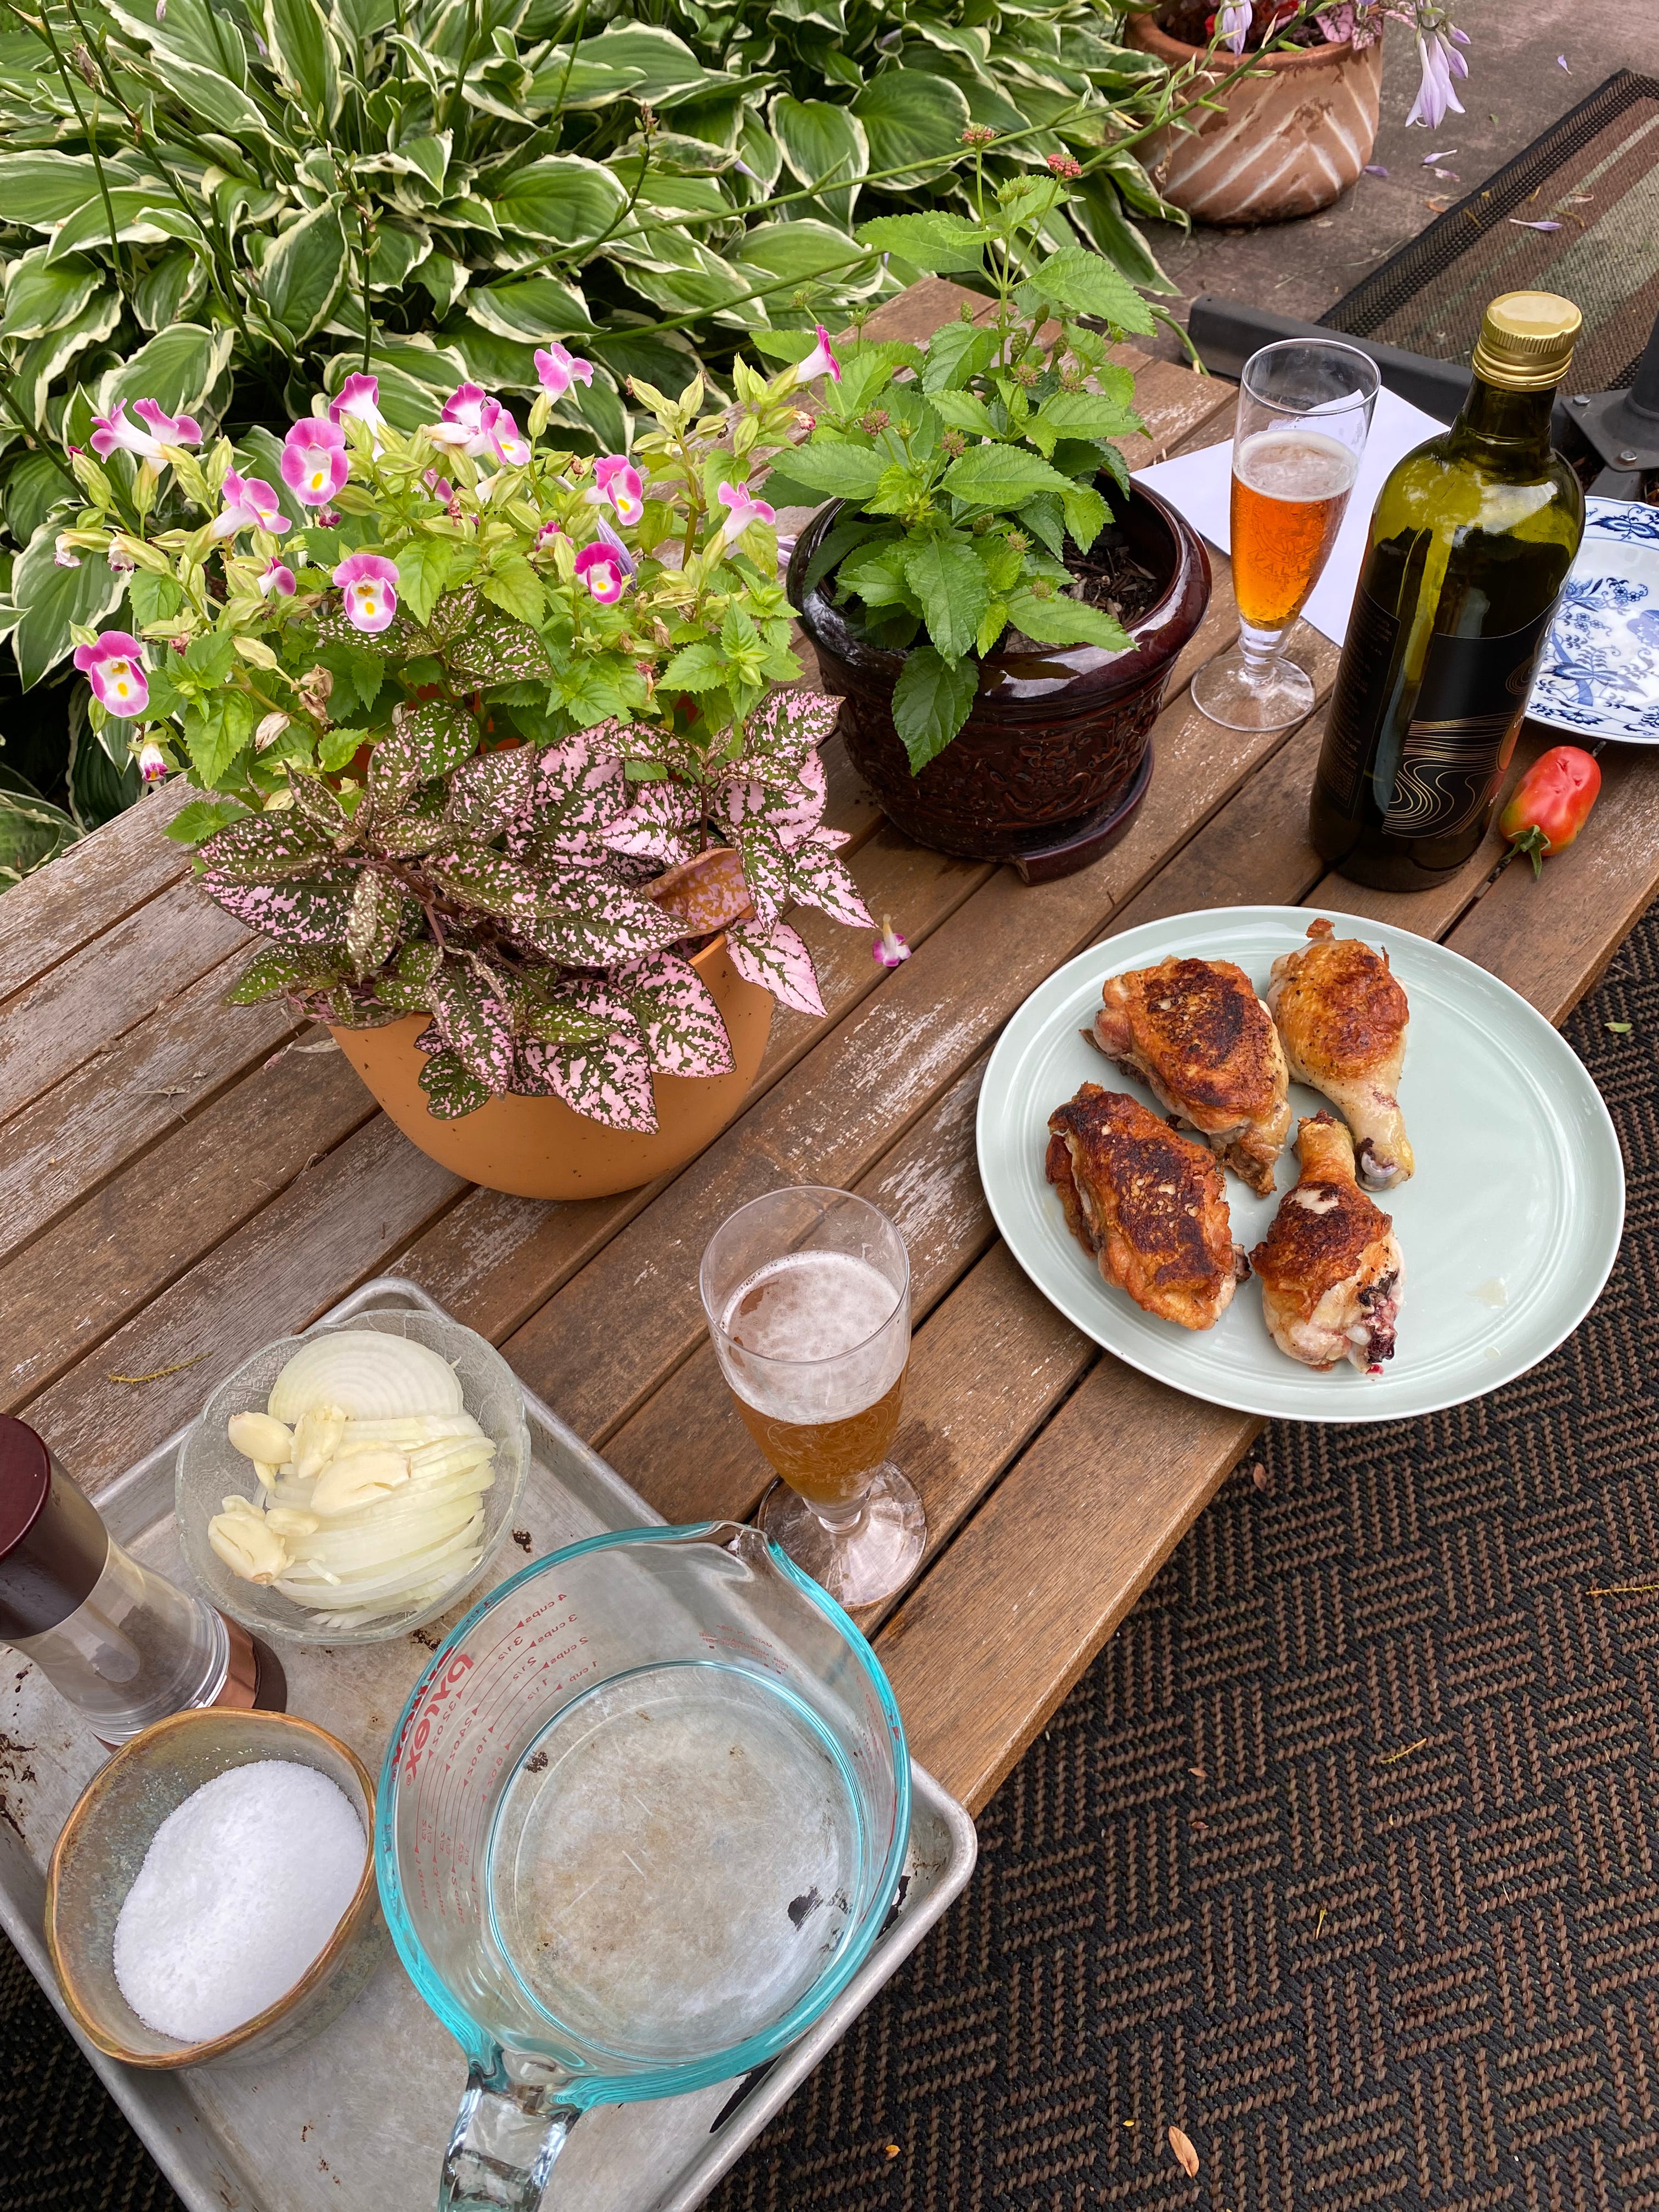
Alison Roman’s Spicy Vinegar Chicken // One of my all-time favorite recipes, by one of my all- time favorite chefs. This recipe is a thing of beauty. Not only is it packed with flavor and easy to put together- it also enforces several confidence-boosting, core skills (seasoning, browning, flavor building and layering) but it also highlights the wonder of peak summer tomatoes so elegantly. Beautiful browned chicken, cooked in a tangy chili vinegar sauce and served over a bed of sliced tomato and raw onion. The juices from the chicken and the vinegar sauce transform a simple salad (the tomatoes and onions) into a thing of true beauty and complexity. I highly recommend using this recipe as an excuse to practice breaking down a whole chicken, but buying parts is obviously fine as well.
Carbonara // I’m still working on perfecting the four Roman pastas (cacio e pepe, gricia, amitriciana, carbonara). Italian carbonara is much lighter and simpler than the same dish you’ll receive in an American restaurant. I’ve really enjoyed playing around with these pastas and definitely encourage any curious home cook to do the same. Not only are these dishes incredibly quick to put together (each requiring 6 ingredients or less) but they also drive home core skills such as pasta cooking (al dente!) and emulsions.
I also shared these short videos on my instagram giving you a visual for why I am always reminding you to save your pasta water. This works for reheating any type of pasta but especially with a sauce like this that naturally becomes grainy and pasty after sitting in refrigeration, gently reheating on the stovetop with a bit of reserved pasta water and some gentle movement using tongs will revive the dish and coax the sauce back into emulsion.
Corn & Pepper Tacos // Another true banger inspired by Mama Eats Plants weekly meal plan. This was light, fresh, easy to put together and another great example of letting the glory of summer produce shine and do the heavy lifting in the kitchen. I whipped up some quick, half-homemade refried beans (something like this), slathered them on warmed corn tortillas, then filled with lightly sautéed sweet corn off the cob (from my absolute favorite farmstead- ‘The Farm’ ) and thinly sliced shisito peppers. These tacos were light on the palate and satisfying to the appetite. They came together in about 20 minutes with minimal cleanup. Topped with a final flourish- a homemade cashew lime crema.
Segment Two- Dished Out: Answering listener questions
Question: How do I add more umami flavor to my soups?
Answer: First of all, great question! Soups can easily be too bland, earthy, muddy etc. Incorporating some deep umami flavor is a great way to make the flavors pop. Here are my favorite ways to do it.
adding a good, double concentrated tomato paste during your sauté (and/or a good bullion paste)
incorporating mushrooms (sautéed deeply, not just simmered)
deglazing with wine
finishing with soy sauce, vinegar, fish sauce or Worcestershire sauce
simmering parmesan rinds in your soup (don’t forget to stir!)
garnishing with a good, aged cheese
Question: What are the best materials for cutting boards and how should I take care of them?
Answer: I love wooden cutting boards. I know there is concern among many about them ‘soaking up’ bacteria but the opposite is actually true. Wood is naturally antibacterial. Here is some basic care for wooden boards:
Wash and rinse regularly, especially after cutting meat.
Don’t soak (this will create bulging and splits).
Wood boards will take some scarring from knife work. This is ok and will often even out on its own with use and proper care. If they become too scarred, simply sand down lightly with sandpaper. (I have only ever sanded a board down once or twice)
Wood boards do need to be oiled on a somewhat regular basis. Apply a small amount of food grade mineral oil to a damp rag and rub all over the surface of your clean, dry board in a circular motion. Allow to sit for 10 minutes and then buff with a clean dry rag. Frequency of oiling depends on the amount of use they are getting. I use my cutting board every single day and typically oil once every 3-4 weeks. An easy way to tell if your board needs to be oiled is by sprinkling a few drops of water and seeing if they bead (no oiling necessary) or soak right in (time to oil).
You can sanitize your wooden cutting boards by spraying with rubbing alcohol and wiping dry. Do not use Clorox or lysol wipes on food surfaces.
Bamboo boards need to be treated basically the same as wood but are generally less expensive and are considered more sustainable. In my experience they require less oiling. The downside (in my opinion) of bamboo is that it is harder than wood, which creates less scarring on the board but does blunt your knives faster which means you’ll be sharpening more often.
A newer, popular option is composite boards made from compressed wood fibers. They a gentle on knives and do not need to be sanded or oiled. They can also go in the dishwasher to be sanitized. These boards are a great all purpose option- they are just inherently more expensive than wood or bamboo.
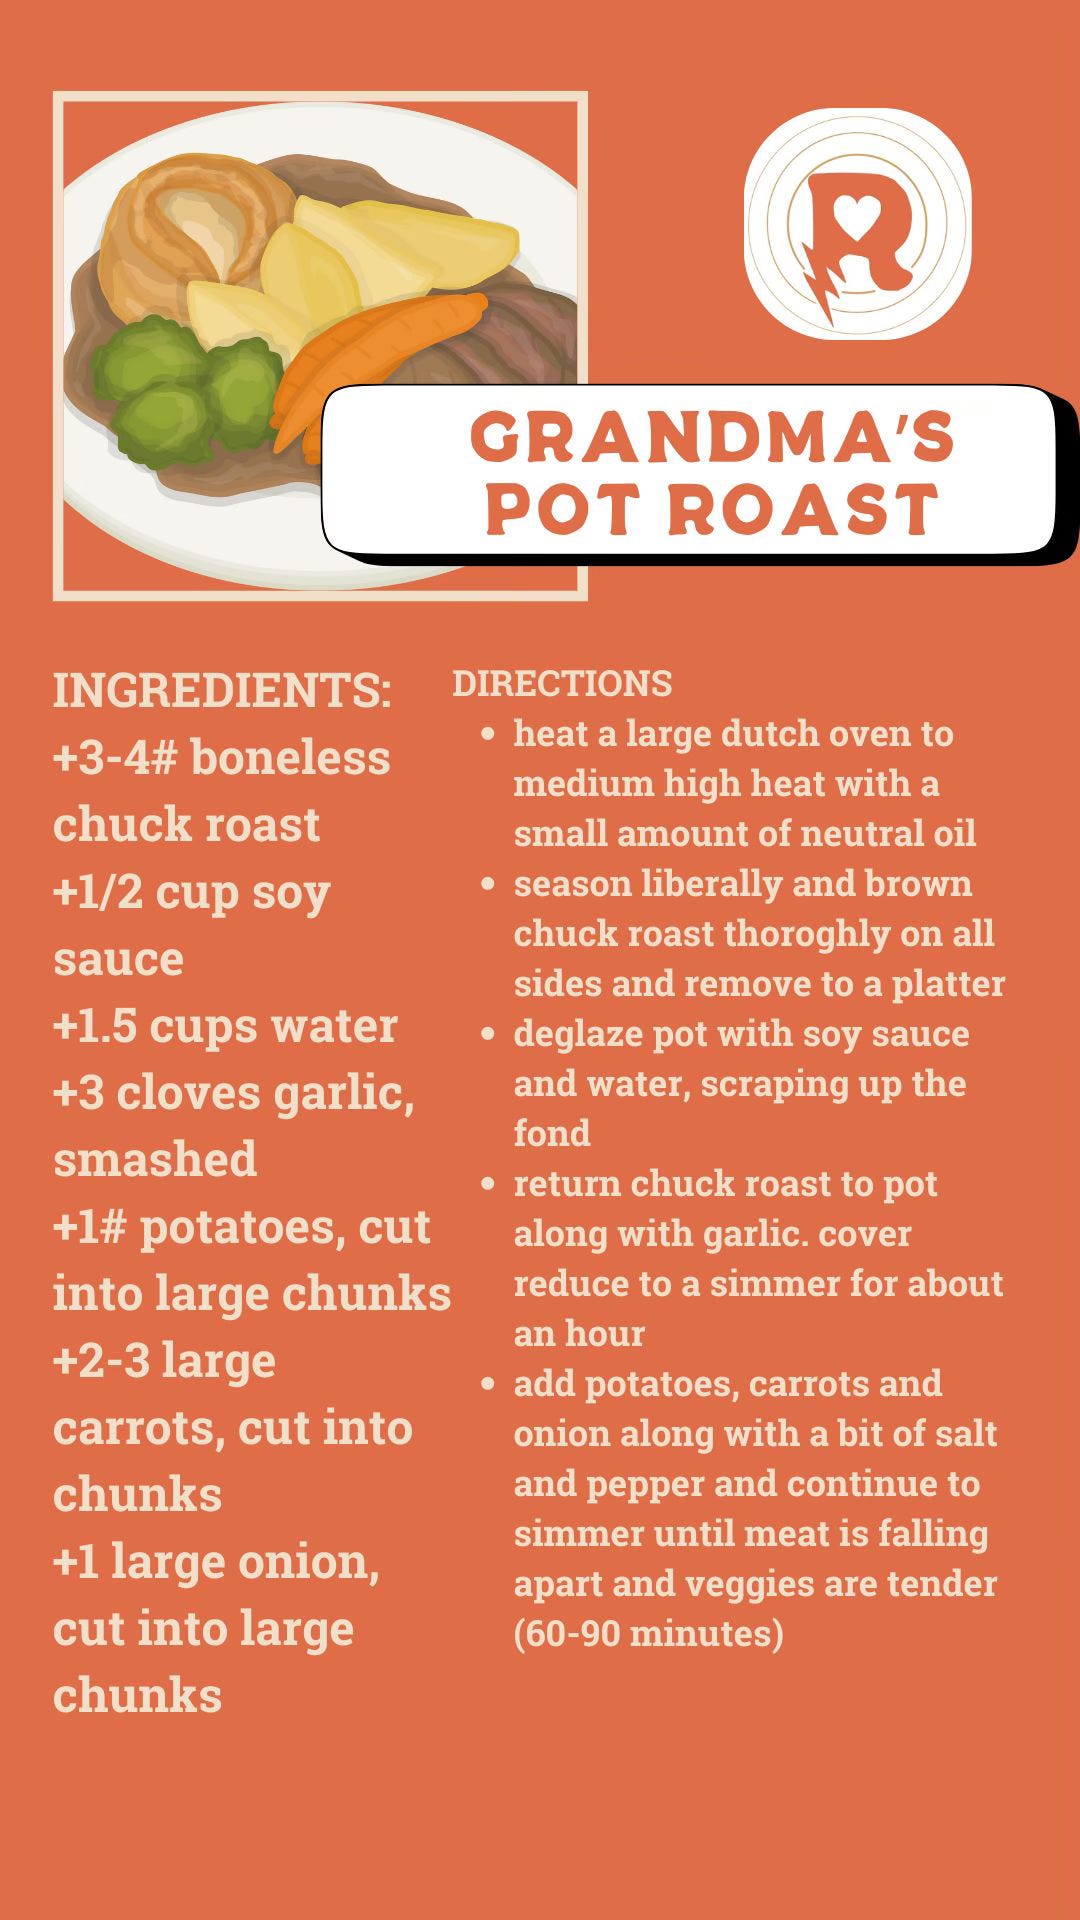
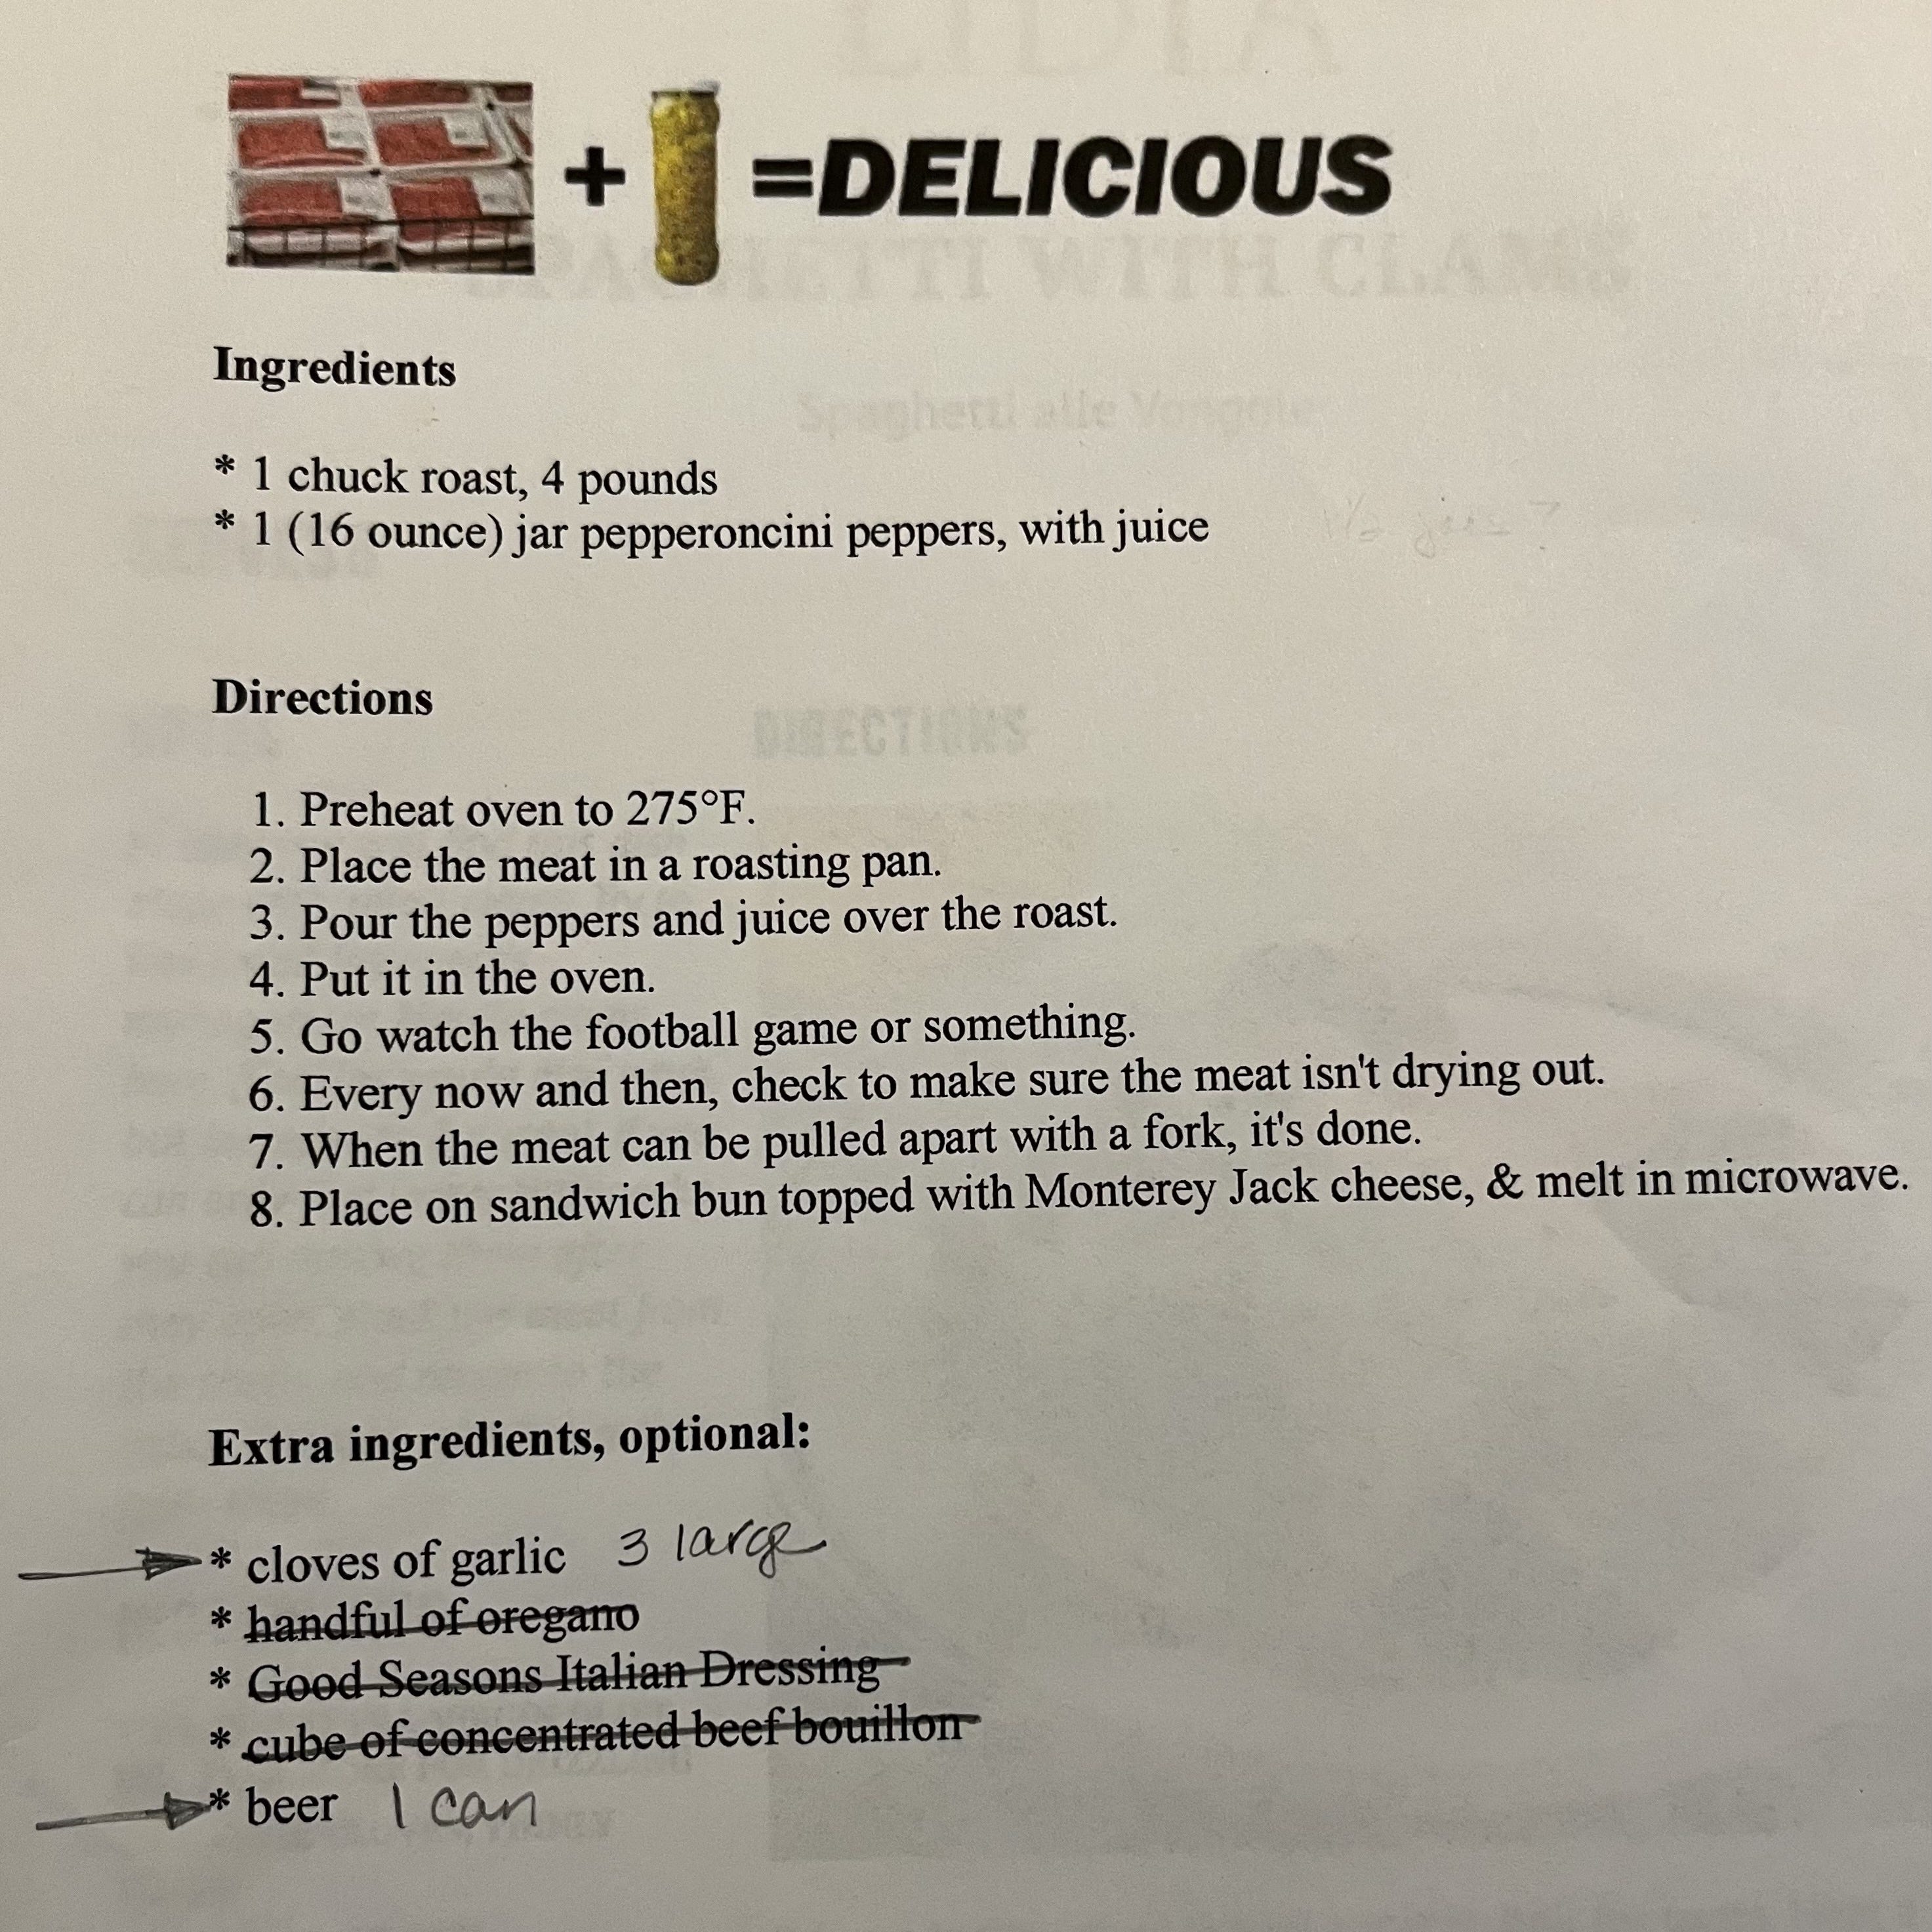
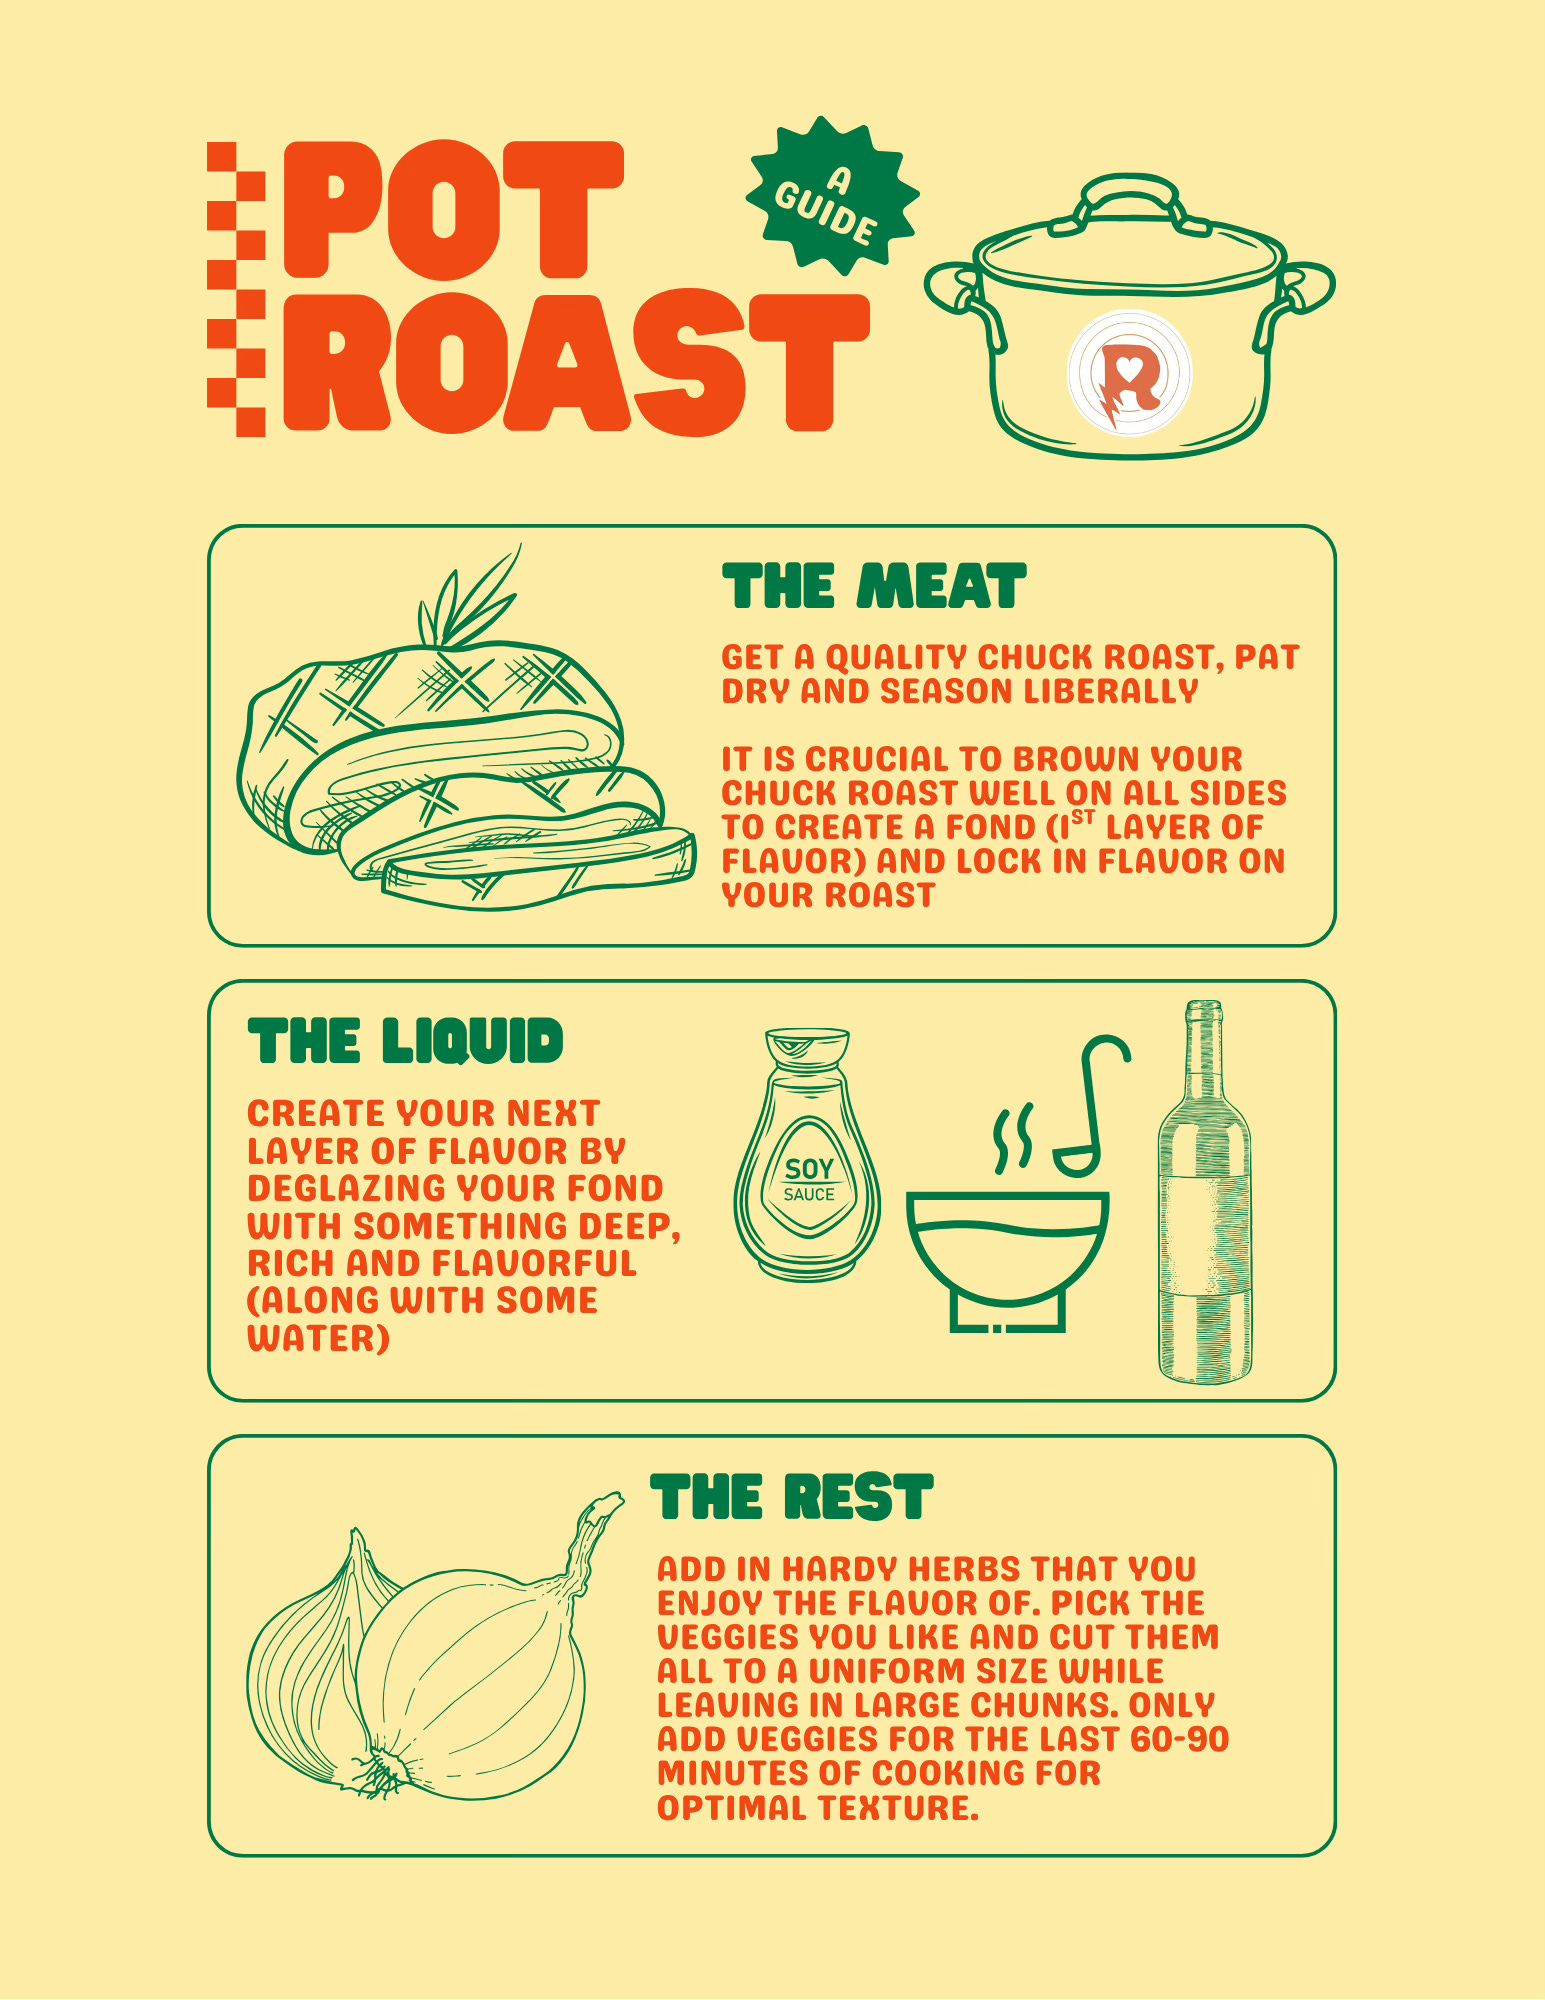
Question: Any good pot roast recipes?
Answer: I’ll do you one better. Here are my two favorite recipes- one being my grandma’s very old school recipe that always comes out perfect and the other being of the new school and more of a beef sandwich than a pot roast though the cooking method and general concept is the same. I’ve also attached a graphic outlining the most important aspects of a truly great and flavorful pot roast that you can lay over any recipe you want to use. Enjoy!
Segment Three- Sharp & Short: Quick tips for you kitchen success
+Want a quick, simple way to test the doneness of your steak without using a thermometer. Try out the finger-test next time you’re cooking a steak. It focuses less on exact temperature and more on getting a feel for what different doneness levels actually feel like- giving you more confidence!
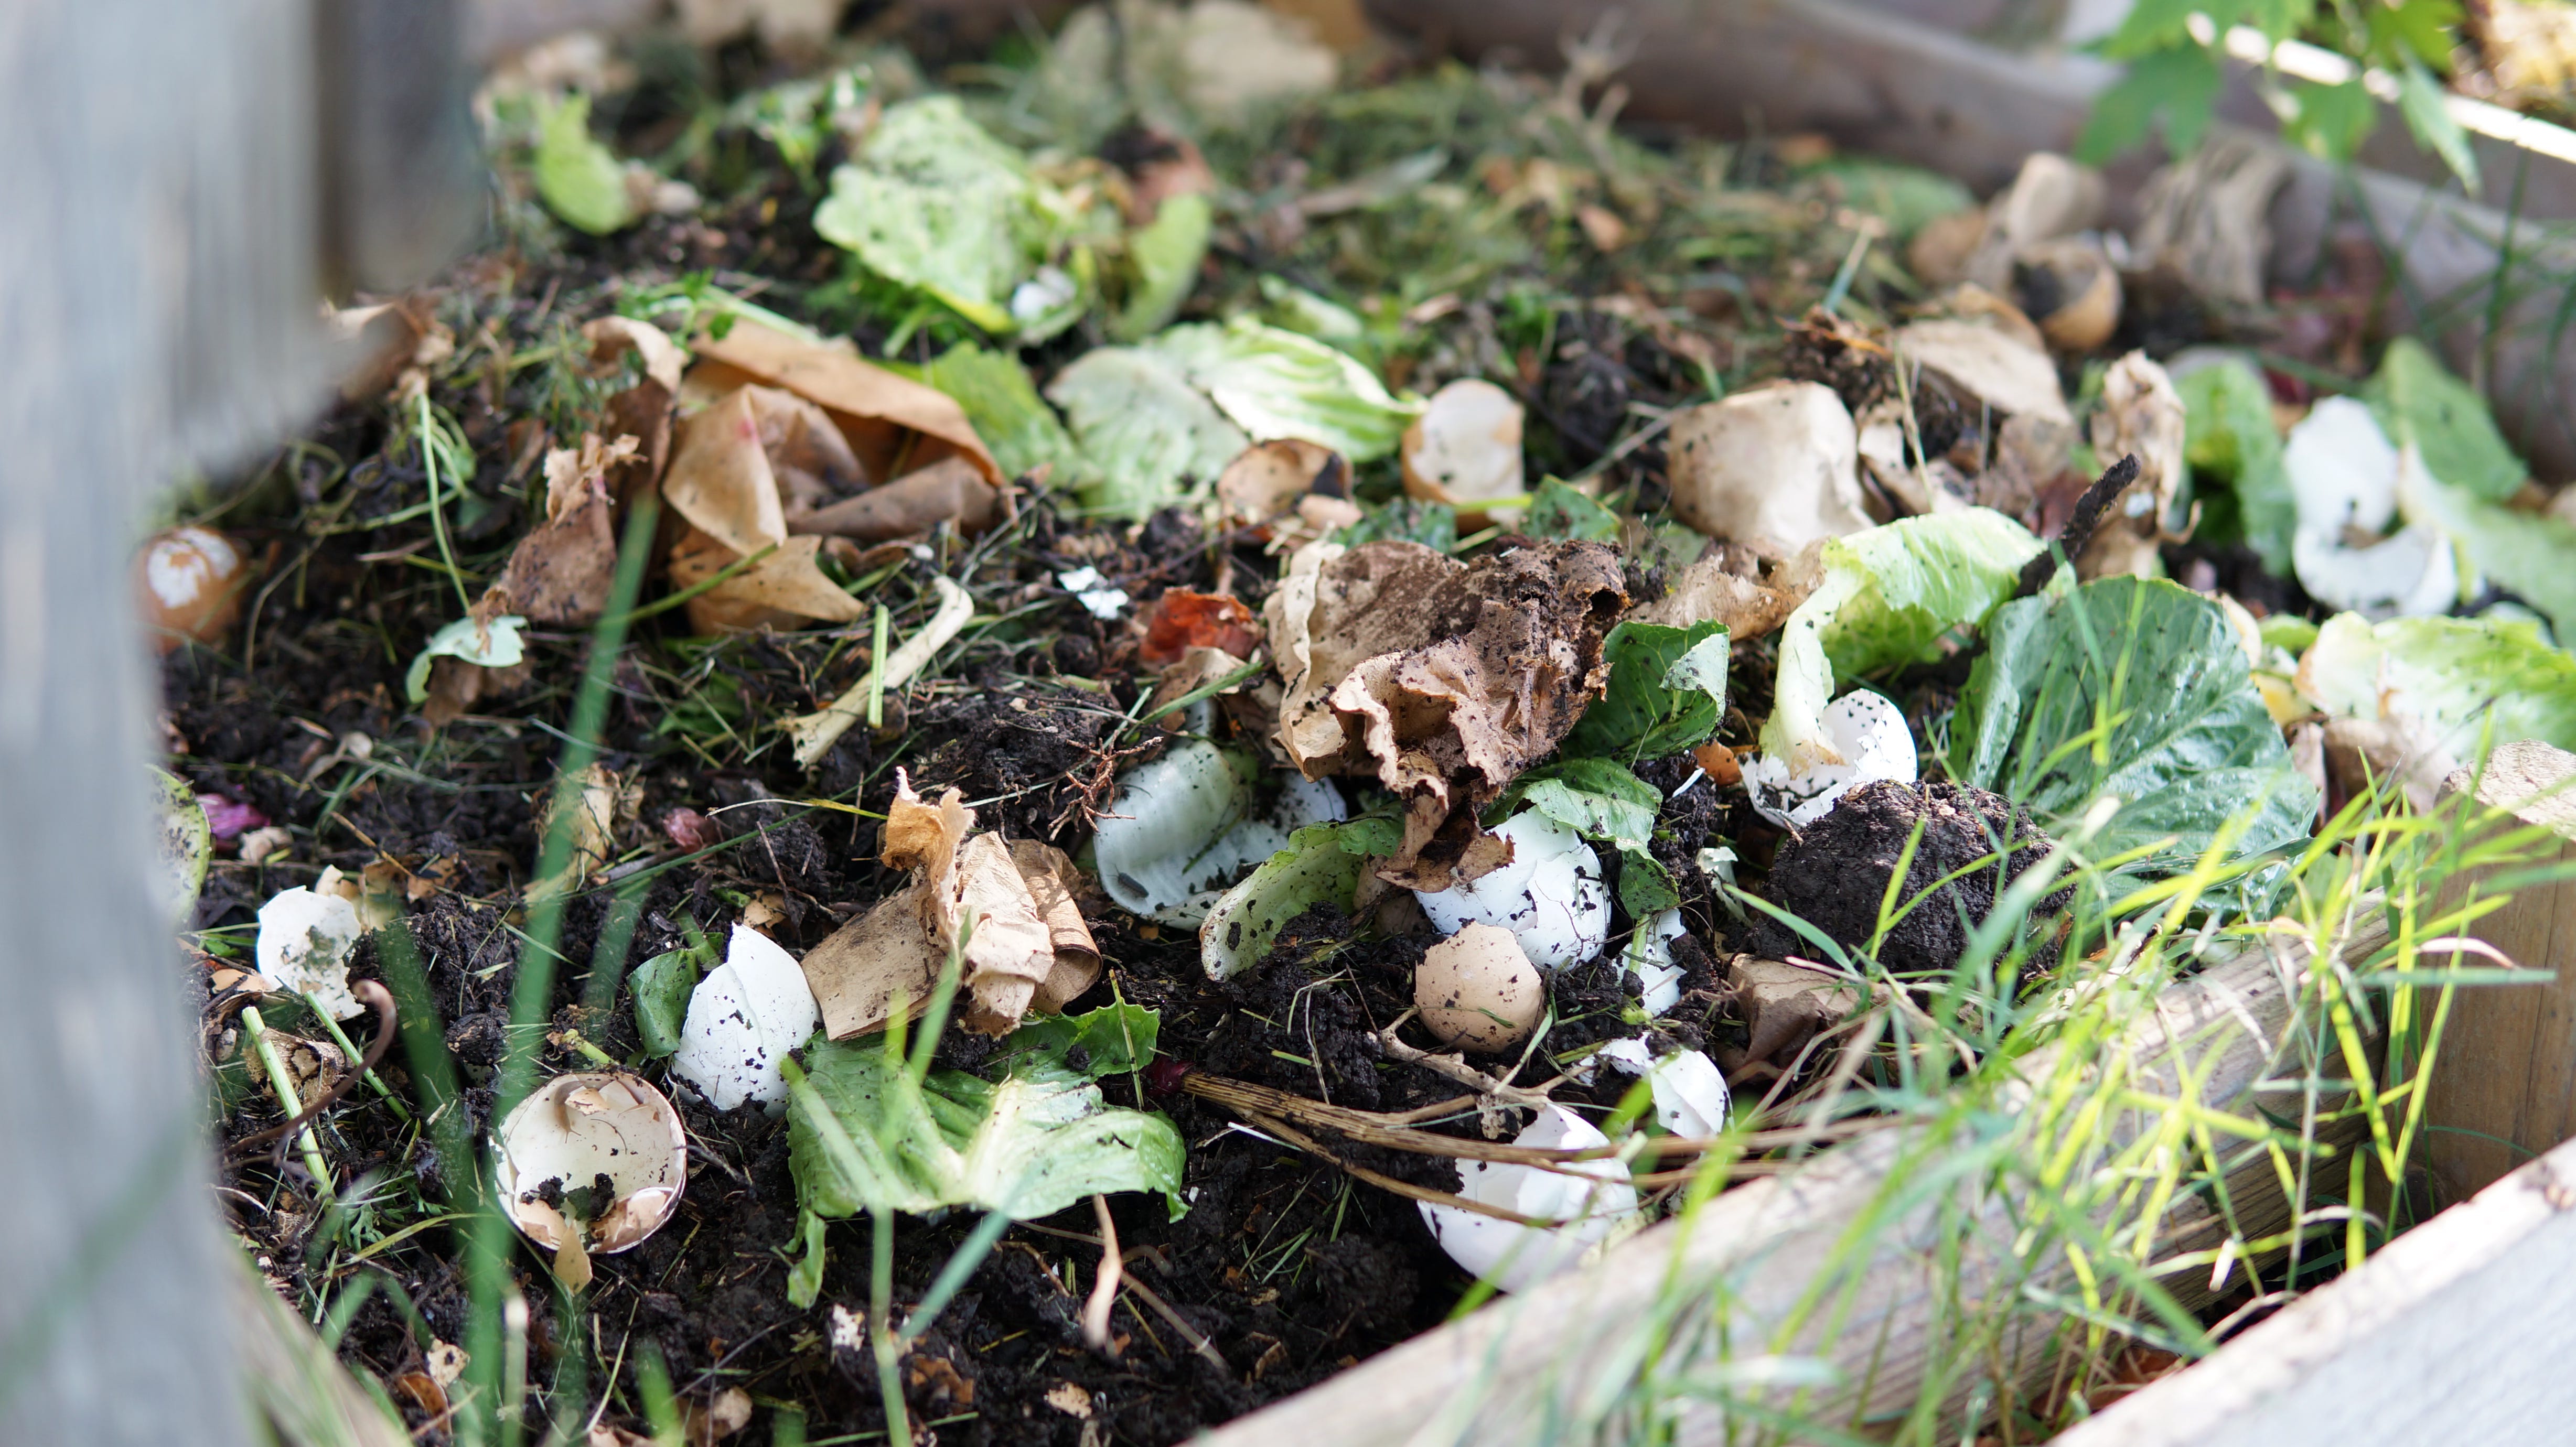
+Want to start a compost pile in your backyard but are overwhelmed by amount of information online? It really is more simple than you think. While this method takes a little longer to break your food scraps down into usable compost, it DOES work (quite well I might add) and requires minimum, time, materials and brain power. All you need to do- is dig a small divot in the earth. You’ll want to remove the top layer of grass. You can make this easier on yourself by just smothering the area you want to use with either cardboard or a tarp and letting the grass die naturally over a few weeks. You want this area to be about 18-24 inches across and about 2-3 inches deep. Then- just start collecting and dumping your scraps. You can toss any organic matter (we’re talking biology not USDA) just no meat or dairy. Veggie scraps, fruit peels and cores, coffee grounds (even some filters!) egg shells, bread, even your yard waste! Let it bake in the sun and turn or mix with a pitchfork or shovel every few weeks.
+Oh no! I made my dish too salty! Or too sweet! Or too spicy! How can I fix this on the fly?
If your dish is too SALTY add: starch, sweetness or fat
If you dish is too BLAND add: salt, acid, spice
If your dish is too SWEET add: salt, acid, spice
If your dish is too ACIDIC add: sweetness, fat, dairy
If you dish is too BITTER add: sweetness, fat, acidity
and if your dish is too SPICY add: fat (primarily dairy), acid, or sweetness
Thanks again for tuning in folks, see you next month!
xoxo
RC